Are you tired of blur photos that lack that professional touch? Or you wish to use a picture but don’t have permission to post that in your Blog due to privacy issues. If you’ve ever faced these designer issues you’re not alone. Many creators face the challenge of enhancing their visuals to make them truly stand out. But now you should stop worrying as we got a simple yet impactful solution waiting at your fingertips – How To Blur Photo Using Canva?
Imagine you are able to draw attention to your designs and make your ideas appear stand out from the crowd. Blurring achieves this by giving your works an artistic finish that captures the viewer’s attention.
We’ll unfold in detail How to blur Photo using Canva, from the reason for blurring to the problems faced while blurring, and provide you with simple yet effective solutions. As we reveal the secrets of Canva’s blurring feature, get ready to elevate your graphics from ordinary to extraordinary.
What is the Need for Blurring A Picture?
A picture’s blurring accomplishes several crucial tasks:
- Depth and environment: Blurring gives the image a sense of depth as the main subject of the image stands out by blurring the backdrop or unimportant features enhancing its visual appeal.
- Telling Stories: Blurring might suggest movement, quickness, or a dreamlike quality, adding to the image’s story. It is used especially in wedding photography and movies.
- Professional Aesthetics: When used properly, blurring gives photographs a polished, artistic touch that improves their overall quality and impact.
- Depth and environment: Blurring gives the image a sense of depth by making the foreground subject stand out against a softer, less-defined backdrop and enhancing its visual appeal.
- Emotional Effects: Blur Photos using Canva can express strong feelings from viewers and give a sense of intimacy or mystery.
- Privacy and Anonymity: In certain cases, blurring is employed to protect individuals’ identities, especially in photojournalism or documentaries. One can use it anywhere, From frauding people by pretending to be you or using your Profile as their Tinder profile. The possibilities are infinite. It allows subjects to remain anonymous while still participating in the visual narrative. Maintaining Privacy is a crucial feature while uploading things online and blurring can help with it.
Is It Easy to Blur Photo Using Canva?
We bet you didn’t know how to Blur Photos Using Canva before reading this article or even that we could edit photos on Canva. Good news!
It can be done quite easily so Canva is a widely used platform for all your design needs. Whether you are a student or a professional, Canva caters to all your design needs.
How To Blur Photo Using Canva
This is a step-by-step guide on how to blur photo using Canva to add a touch of pizzazz to your photos. It will amplify your visual storytelling and make it aesthetically pleasing.
You just have to follow a few easy steps to achieve an artistic blur in your photos. After that, the picture can be either downloaded or used further in a template.
We will be doing a step-by-step guide on how to Blur Photo using Canva. For this, we recommend getting a Canva Pro account.
Tip: You can sign up for Canva Pro for free if you are a student or a teacher. Basically, anyone with a student or professional email address can get Canva Pro for free. A .edu e-mail address is all you need.
Let’s first see how you can save a few bucks and get Canva Pro for yourself.
You will be surprised to see how easy it is to learn How to Blur Photo Using Canva.
How To Get A “Canva for Education” Account
Step 1: Go to https://www.canva.com/education/.
Step 2: Click on “Get verified” under “Teachers. You can see the same in the image below.

Step 3: Sign up with an email address from your school, high school, college, or university.
Step 4: Login from the verified account.
Now that you are all set up with your brand new and free Canva Pro accounts, let’s see how to blur photos using Canva.
Also Read: Twitter Logo Changed? Here’s What You Need to Know
How to Blur Images on Canva
Let’s get started on learning How to Blur Photo using Canva
Step 1: Log onto your Canva application or website.
Step 2:Now, You will see the option to “Upload” in the top right corner.
Step 3:Then, upload the photo that you wish to edit by dragging and dropping it into the editor or you can upload an image from the device.
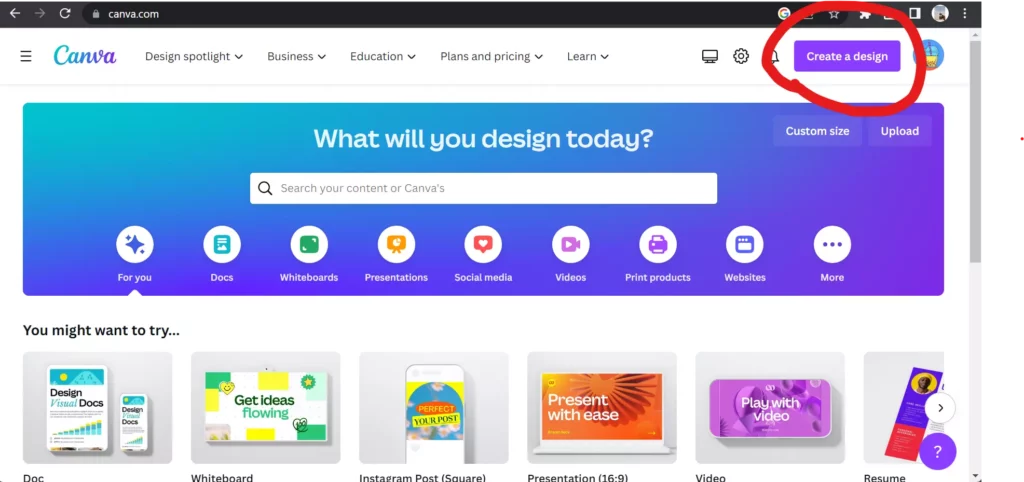
Step 4: This will prompt two actions. “Use in a new design” or “Add to a template”. If you wish to directly add to the template, you have to select a template first.
Step 5: Once you have selected the desired template, you can find the photo under the tile “Uploads”. Now if you want to use it in a new design, then you would have to create a simple template by yourself.
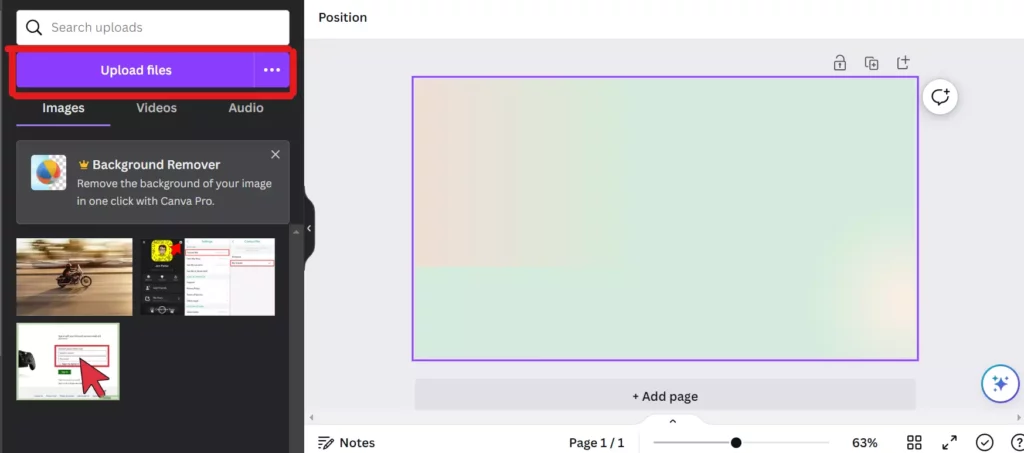
TIP: There is a third and easier option. You will see the option “Edit Photo” in the bottom left corner. The option is a bit greyed out so you might miss it at first glance but I assure you it’s there!
Step 6: When you are on the editing page look for Effects and you can now Blur Photos Using Canva Choose a blur effect and it will be applied to the image in real time. You can also add other effects and filters.
TIP: You need a Canva Pro for some of the options so you can refer to the steps above to create a new Canva Pro account.
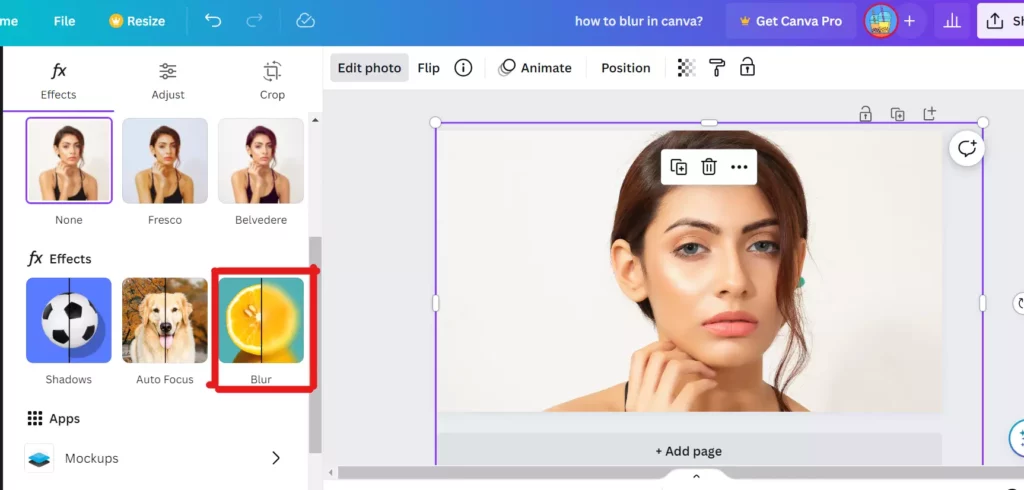
Step 7: At last, you can adjust the intensity of the blur or even the area of the blur by using the sliders or handles that appear on the photo. It’s pretty intuitive to use so you can play around and make the magic happen.
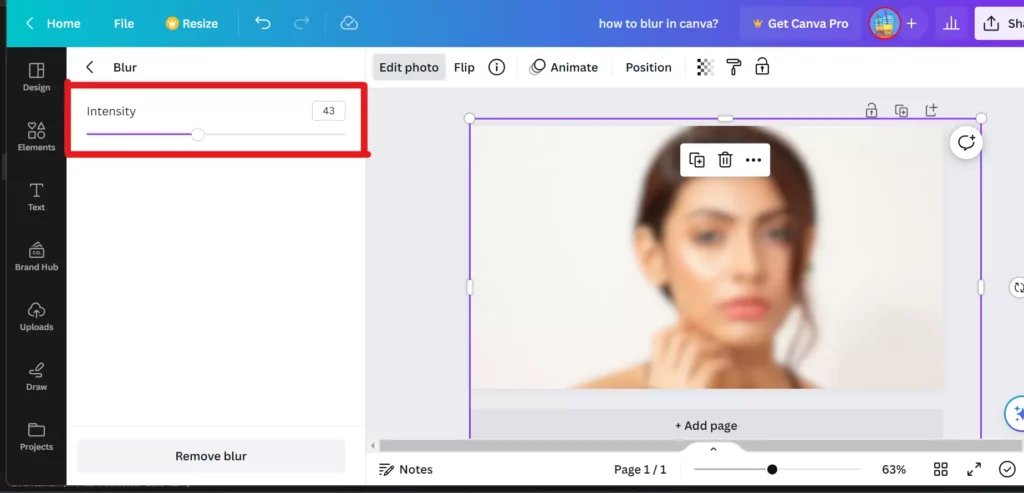
After you’re satisfied with the edits, simply download the image for future use or you can continue to use it on a template. Voila! An artsy image is ready to use in your logos, assignments, or posters.
How To Blur The Face In A Photo Using Canva
Canva has made graphics and design simpler. Designing stunning creative materials is made simple for everyone with Canva.
Blurring the face in a photo might be required for a variety of reasons. Be it for privacy, legal reasons, or even for content creation to keep the viewers confused.
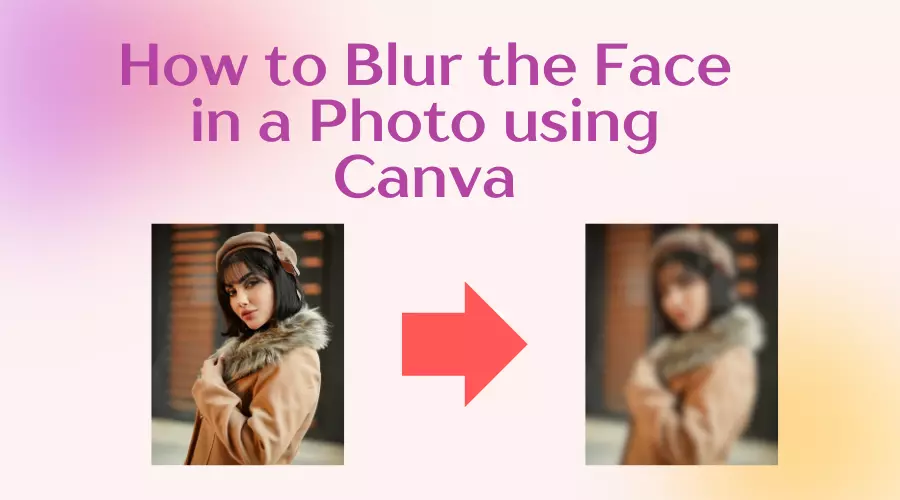
You’re all set to learn this skill with our 7-step strategy:
Step 1: You may open Canva on Chrome or you may also download the Canva app from Playstore or AppStore.
Step 2: Select the image that contains the face which you wish to blur.
Step 3: Select the image to enable the edit option.
Step 4: You will find the“edit image” option in the top left corner, select it to proceed to blur the image.
Step 5: Scroll down to the end and click on the “Blur” option
Step 6: Now you can increase or decrease the intensity of Blur as per your needs. This is an amazing feature provided by Canva from which you can perfectly blur a face in a photo.
Step 7: Finally, use the brush to blur the region of the Face you want to and it’s done.
Those were the 7 simple steps and bravo its done. Now you need not search about How to Blur the Face in a Photo using Canva ever again. If you are done editing and wish to transfer the image without dropping its quality you can use We Transfer alternatives.
Hope you found the information helpful
Conclusion
Canva has made graphics and design simpler. Designing stunning creative materials is made simple for everyone with Canva. Blurring an image plays a vital role as it helps to maintain privacy, achieves professional aesthetics and decides the depth of the object. We know the guide helped you in learning how to blur an image in Canva.
FAQs
How do I blur part of the picture in Canva?
Is There a Blur tool in Canva?
Where is the blur effect on Canva?
How can I make a photo partially blur?
How do I add pictures to blur on Canva?
